
Cartoon Outline Effect
 -
-
In my 3D games and designs I often go for a cute low-poly cartoonish style. I have long wanted to give my models an actual cartoon-like outline, so that’s what we’re going to work on today. In a future post we will look at coloring the triangles to look cartoonish as well.
This article is part of my ongoing series of medium difficulty ThreeJS tutorials. I’ve long wanted something in between the intro “How to draw a cube” and “Let’s fill the screen with shader madness” levels. So here it is.
If you search the web for “OpenGL outline effect” you’ll run into a lot of conflicting information. After much research I have determined there are two common ways to create an outline using modern 3D graphics APIs.
- Draw an object twice; once in the outline color, and once normally.
- Run the entire scene through a post-processing effect that detects edges at the pixel level.
The second option is most commonly used today in modern game engines like Unity. However I don’t want to use it because it involves multiple post-processing steps which can be slow on mobile GPUs and consumes more memory. Also, post-processing and WebVR don’t mix very well right now, so I’m avoiding it for the time being. (We’ll revisit this when I cover glow effects). Let’s focus on the first method, drawing the same object twice.
Rendering an object twice might seem wasteful, but remember that most GPUs are bandwidth limited. Once you get the geometry to the GPU it can render the same thing over and over for almost no cost. And in most cases the things I want to outline are static geometry.
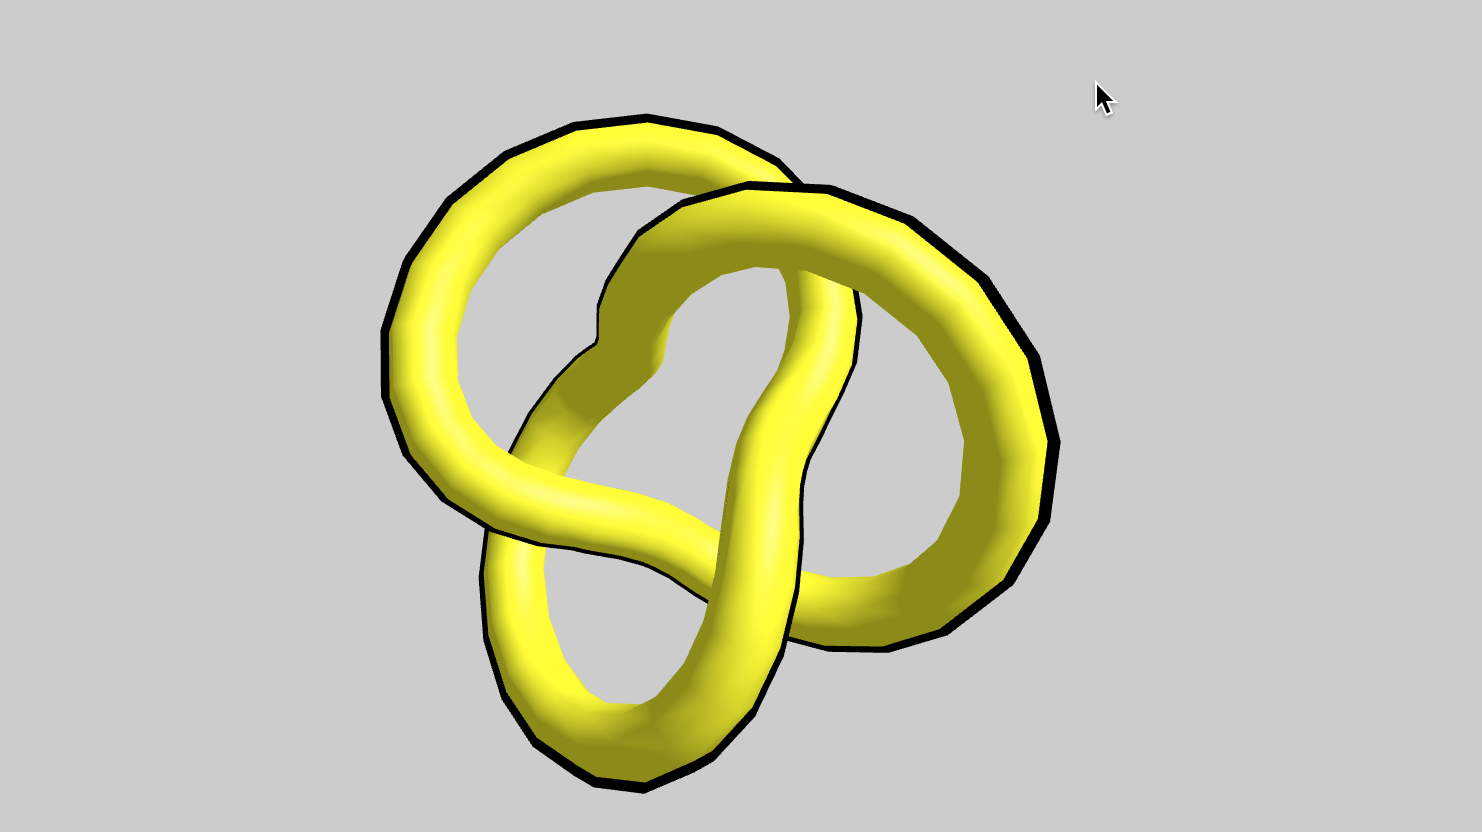
Let’s start by rendering a torus knot twice, once in black and once in yellow. This trick that makes this work is scaling the outline so it is slightly larger than the main object.
//create a cube
obj = new THREE.Group()
const c1 = new THREE.Mesh(
    new THREE.TorusKnotBufferGeometry(0.6,0.1),
    new THREE.MeshLambertMaterial({
        color:’black’,
    }))
const s = 1.03
c1.scale.set(s,s,s)
obj.add(c1)
obj.add(new THREE.Mesh(
    new THREE.TorusKnotBufferGeometry(0.6,0.1),
    new THREE.MeshPhongMaterial({
        color:’yellow’,
    })
))
Run this and see what happens. Hmm. Depending on the geometry you are using you’ll either see something that is all black or duotone, partly black and partly yellow. Also notice a few black triangles peaking out from the yellow? That’s called z-fighting. So what is the problem.

It sort of makes sense, actually. The black knot is expanded slightly so wherever the yellow not would be visible the black night is slightly in front of it. So how can we solve this?
Culling Explained in 15 seconds
We are going to take advantage of a little trick.
When the GPU renders a triangle its normally only renders front facing triangles. These are the triangles which face the camera. Any triangle which faces away from the camera will, by definition, be invisible, so it doesn’t bother to draw them. If we had a sphere then only the front hemisphere would actually be drawn. The GPU has culled the triangles making up the back facing hemisphere.
For the outline effect we want the regular object to be drawn with only the front facing geometry. This is already happening. However, for the outline we want only the back facing triangles to be drawn. Then they will be behind the regular shapes, only visible on the edges.
As it happens, ThreeJS already knows how to draw front vs back. We just need to tell it what we want. The code below is the same as above, it just sets the side property of the two materials correctly.
obj = new THREE.Group()
const c1 = new THREE.Mesh(
    new THREE.TorusKnotBufferGeometry(0.6,0.1),
    new THREE.MeshLambertMaterial({
        color:’black’,
        side: THREE.BackSide
    })
)
const s = 1.03
c1.scale.set(s,s,s)
obj.add(c1)
obj.add(new THREE.Mesh(
   new THREE.TorusKnotBufferGeometry(0.6,0.1),
   new THREE.MeshPhongMaterial({
       color:’yellow’,
       side: THREE.FrontSide
   })
))
Now it looks like this:
Perfect!
Fixing the Normals
Actually no, it’s not quite perfect. If you look closely you’ll notice that the outlines on the parts of the object which are towards the back are thinner than the ones towards the front. That is because we are simply scaling the entire object up. This naive approach will only work for perfectly convex objects like a sphere. With the knot or any real-life model we need to thicken the geometry correctly.
As it happens most geometry already has normals on it. These normals are perpendicular the the surface of the geometry. If we expand the points in the direction of the normals then everything should just work. We can do this with a slightly modified vertex shader. See THIS OTHER BLOG for an explanation of custom vertex shaders.
//create a cube
const mat = new THREE.MeshLambertMaterial({
    color:’black’,
    side:THREE.BackSide
})
mat.onBeforeCompile = (shader) => {
    const token = ‘#include <begin_vertex>’
    const customTransform = `
        vec3 transformed = position + objectNormal*0.02;
    `
    shader.vertexShader =
        shader.vertexShader.replace(token,customTransform)
}
The code above creates a custom material for the outline object. The rest is identical to before. Inside the shader it adds a fraction of the objectNormal to the position of each vertex, expanding it outwards. Change the 0.02 to a larger value for a thicker outline.
Now it looks like this:
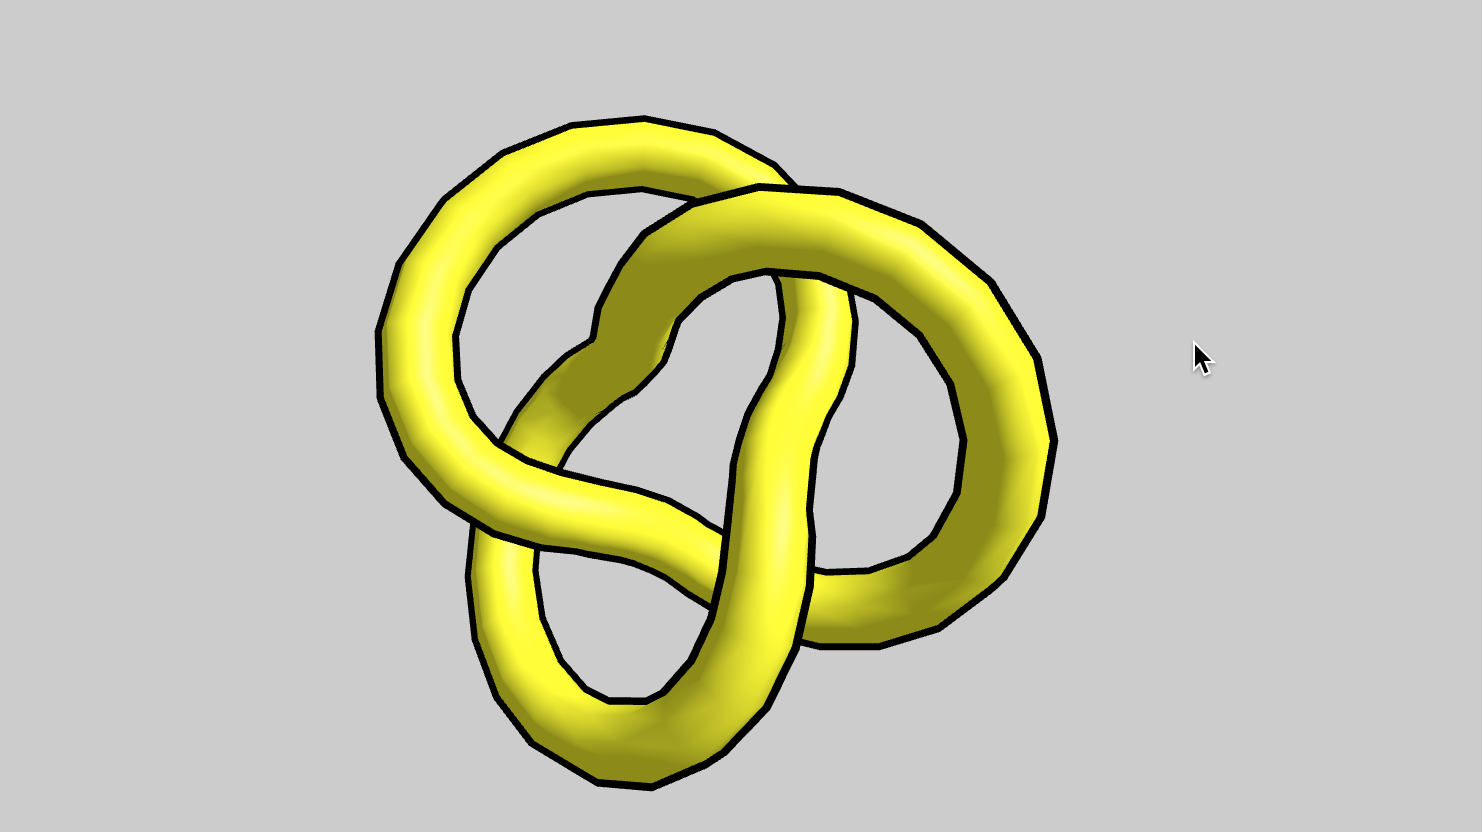
Magnifique. You have created a cartoon like outline.
Get Noticed
By the way, if you are working on a cool WebVR experience that you’d like to have showcased right inside Firefox Reality, let us know