ThreeJS Particles: Color Interpolation
 -
-
Our particle system is working pretty well. We can spawn particles whenever we want, in any direction with any position, velocity, or acceleration. We can even set the color. What we can’t do is change the color over time.
This article is part of my ongoing series of medium difficulty ThreeJS tutorials. I’ve long wanted something in between the intro “How to draw a cube” and “Let’s fill the screen with shader madness” levels. So here it is.
Using a single color is fine for something like snow. Here’s a quick example that randomly positions the particles in the sky above a little Christmas landscape, then has them fall down at a constant speed (acceleration is 0).
const options = {
     maxParticles: 10000,
     position: new THREE.Vector3(0,5,-5),
     positionRandomness: 0.0,
     baseVelocity: new THREE.Vector3(0.0, -1.0, 0.0),
     velocity: new THREE.Vector3(0.0, -0.5, 0.0),
     velocityRandomness: 1.0,
     acceleration: new THREE.Vector3(0.0,0.0,0.0),
     color: new THREE.Color(1.0,1.0,1.0),
     endColor: new THREE.Color(1.0,1.0,1.0),
     colorRandomness: 0.0,
     lifetime: 30.0,
     size: 20,
     sizeRandomness: 30.0,
     particleSpriteTex: texture,
     blending: THREE.NormalBlending,
     onTick:(system,time) => {
         for(let i=0; i<1; i++) {
             options.position.set(rand(-5,5), 8, rand(0,-5))
             options.color.set(0xffffff)
             system.spawnParticle(options);
        }
     }
}
snow = new GPUParticleSystem(options)
snow.position.z = -3
scene.add(snow)
Multiple Colors
Now let’s suppose we want to create a flame. By setting the blend mode to additive we can have yellow that adds up to white in the center, but it’ll never fade to red. What we want is to make the color go from yellow to red over time. Fortunately this is pretty easy. We just need to add another buffer attribute for the end color.
This code is scattered over several places, so let’s get going.
In the vertex shader add an attribute for the endColor, and copy it out to a varying for the fragment shader to use next.
attribute vec3 endColor;
varying vec4 vEndColor;
…
void main() {
…
 vColor = vec4( color, 1.0 );
 vEndColor = vec4( endColor, 1.0);
…
In the fragment shader calculate the final color by mixing the start and end colors using the lifetime value.
varying vec4 vColor;
varying vec4 vEndColor;
varying float lifeLeft;
uniform sampler2D tSprite;
void main() {
 vec4 tex = texture2D( tSprite, gl_PointCoord );
 vec4 color = mix(vColor, vEndColor, 1.0-lifeLeft);
 gl_FragColor = vec4( color.rgb, lifeLeft * tex.a);
}
Now add endColor next to color where the new attributes are created in the GPUParticleSystem constructor
//regular color
this.geometry.addAttribute(‘color’, new THREE.BufferAttribute(new Float32Array(this.PARTICLE_COUNT * 3), 3) .setDynamic(true));
//end color
this.geometry.addAttribute(‘endColor’, new THREE.BufferAttribute(new Float32Array(this.PARTICLE_COUNT * 3), 3).setDynamic(true));
And update spawnParticle to set the value as well
colorAttribute.array[i * 3 + 0] = color.r;
colorAttribute.array[i * 3 + 1] = color.g;
colorAttribute.array[i * 3 + 2] = color.b;

endcolorAttribute.array[i * 3 + 0] = endColor.r;
endcolorAttribute.array[i * 3 + 1] = endColor.g;
endcolorAttribute.array[i * 3 + 2] = endColor.b;
That’s it. It’s just another attribute. Pretty much every place that uses color now also uses endColor. You can see the full code here.
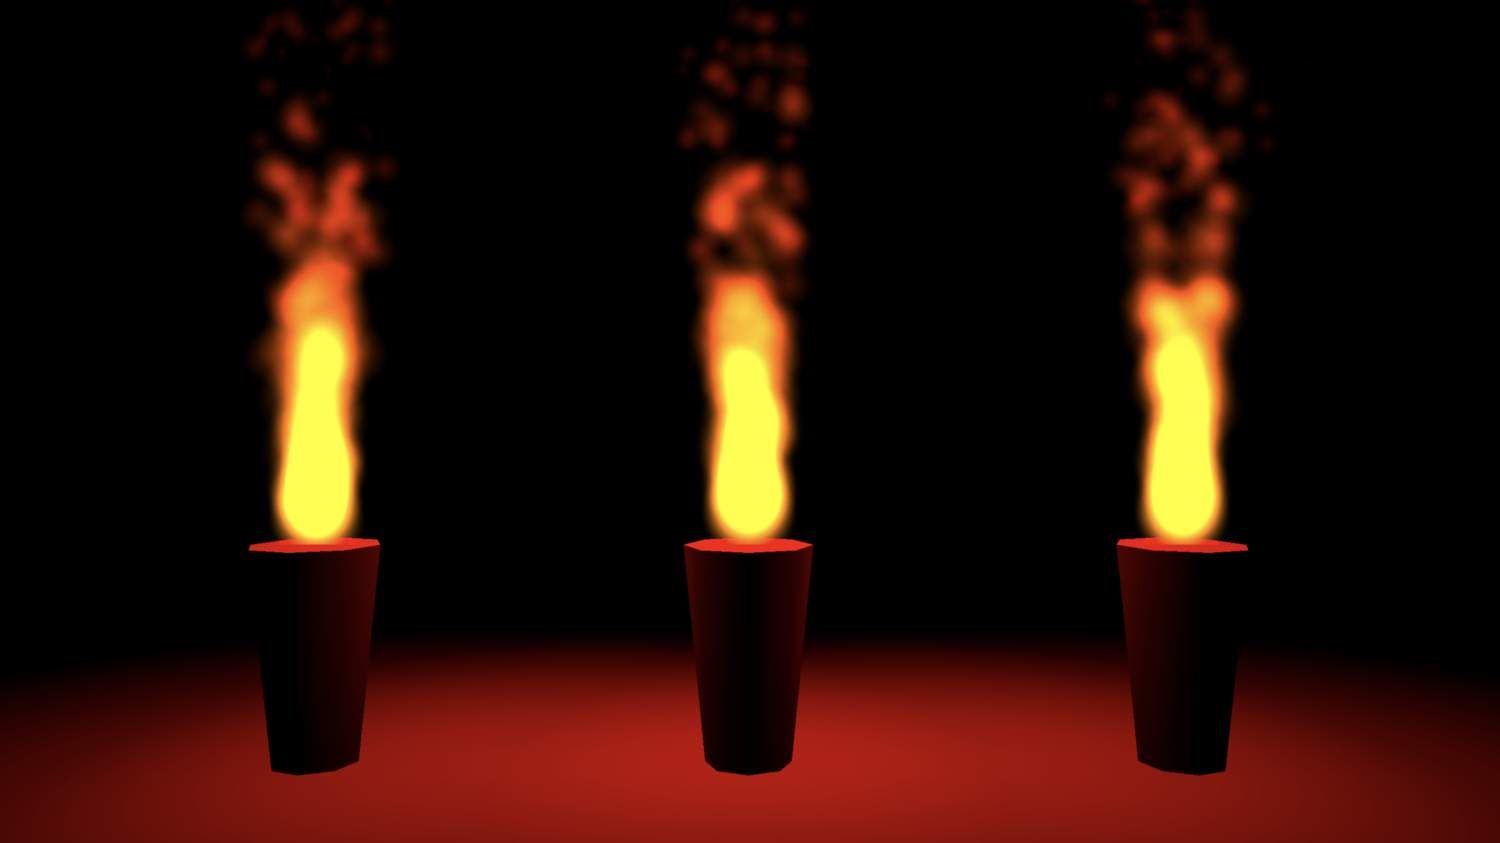
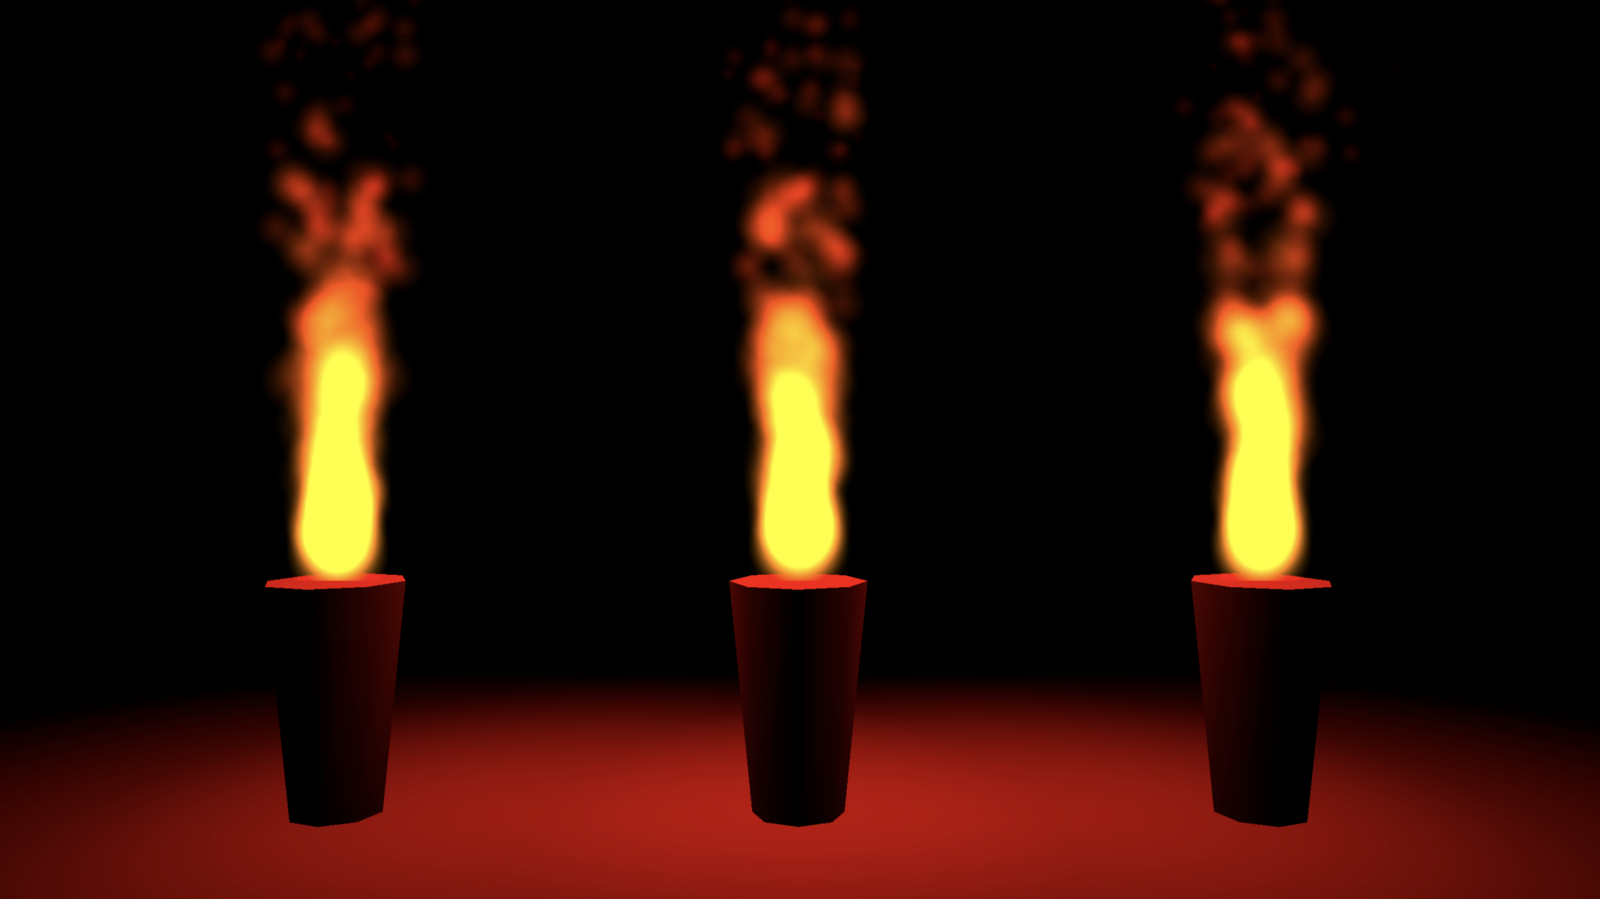
Flames!
Now let’s move on to the torch.
We want the torch to have particles which start in one place, so positionRandomness is 0. The velocity is upward with a randomness of 0.3 so they will fly slightly to the sides. Acceleration is 0. The color and endColor are yellow and red with a slight randomness. I set lifetime to 3 and size to 40, but you’d need to play with these values to find the right ones. Also remember to set the blending to Additive.
This is the code to initialize the torch
const options = {
  maxParticles: 1000,
  position: new THREE.Vector3(0,0,0),
  positionRandomness: 0.0,
  baseVelocity: new THREE.Vector3(0.0, 1.0, 0.0),
  velocity: new THREE.Vector3(0.0, 0.0, 0.0),
  velocityRandomness: 0.3,
  acceleration: new THREE.Vector3(0.0,0.0,0.0),
  color: new THREE.Color(0.5,0.3,0.0),
  endColor: new THREE.Color(0.5,0.0,0.0),
  colorRandomness: 0.5,
  lifetime: 3.0,
  size: 40,
  sizeRandomness: 1.0,
  particleSpriteTex: textureLoader.load(‘./tex/particle2.png’),
  blending: THREE.AdditiveBlending,
  onTick:(system,time) => {
    options.velocity.x = options.baseVelocity.x
           + system.random() *    options.velocityRandomness
    options.velocity.y = options.baseVelocity.y
           + system.random() * options.velocityRandomness*2.0
    options.velocity.z = options.baseVelocity.z
           + system.random() * options.velocityRandomness
    system.spawnParticle( options );
   }
 }
Note how each particle is given a final velocity by adding a random value times the velocityRandomness setting plus the base velocity. Also notice that the vertical velocity has twice the randomness of the x and y values. Again I just played with a few values and this looked the best.
With three torches plus a floor and torch holders I got this cool scene.
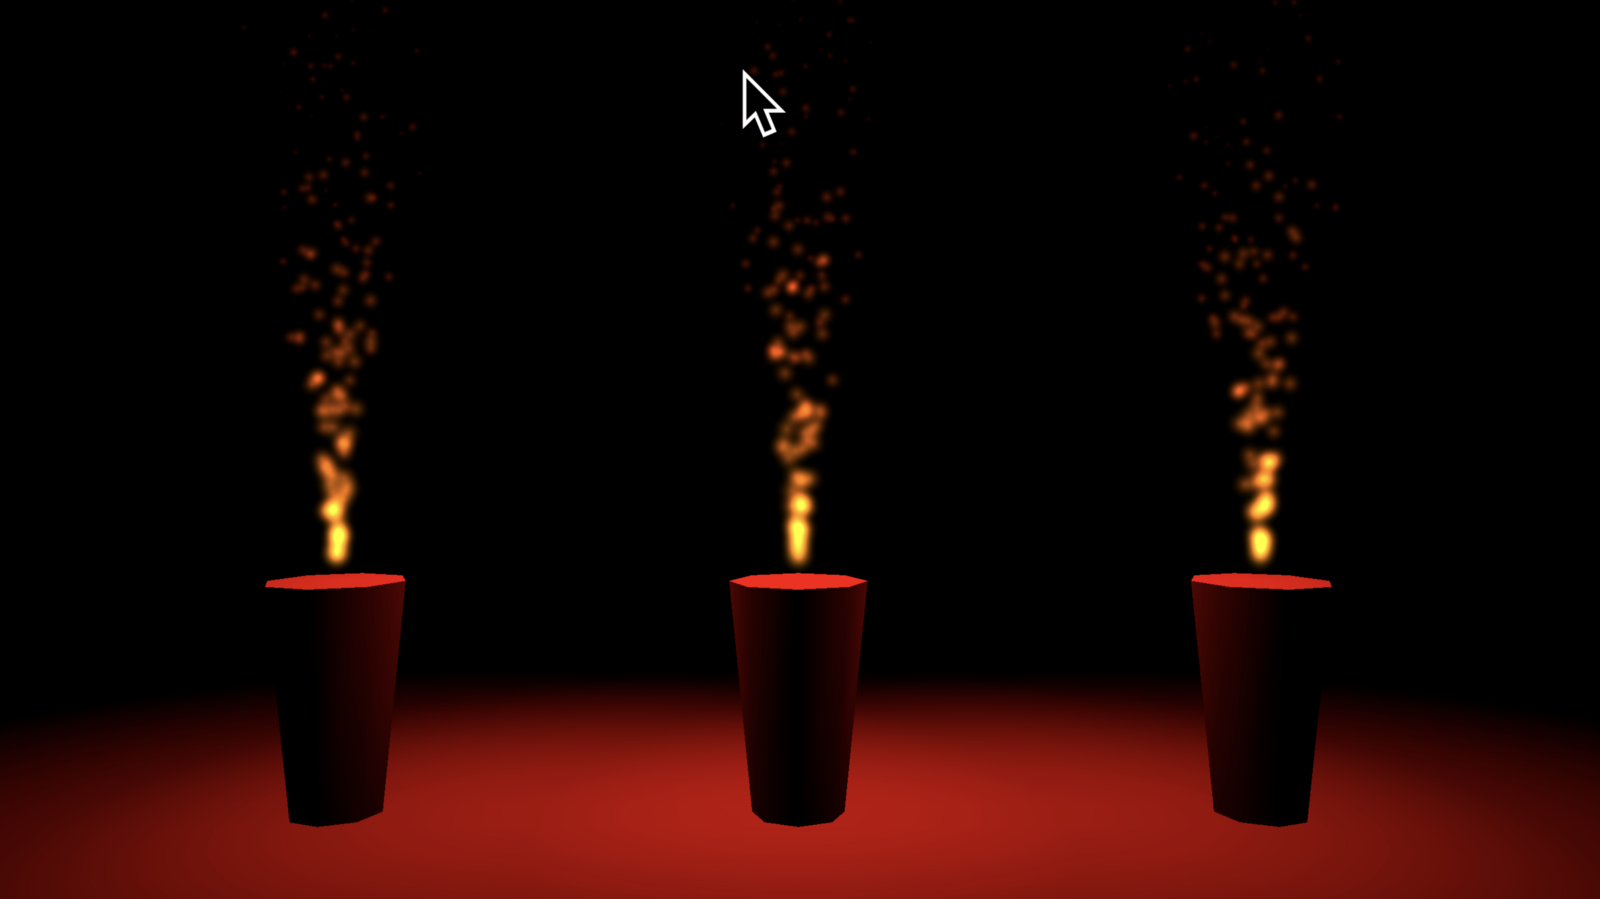
And by changing the particle size I got this:
It’s amazing what we can do with particle systems by just changing the settings. See you next time.
Get Noticed
By the way, if you are working on a cool WebVR experience that you’d like to have showcased right inside Firefox Reality, let us know.