Making Sechelt With three.js and Cinema 4D
 -
-
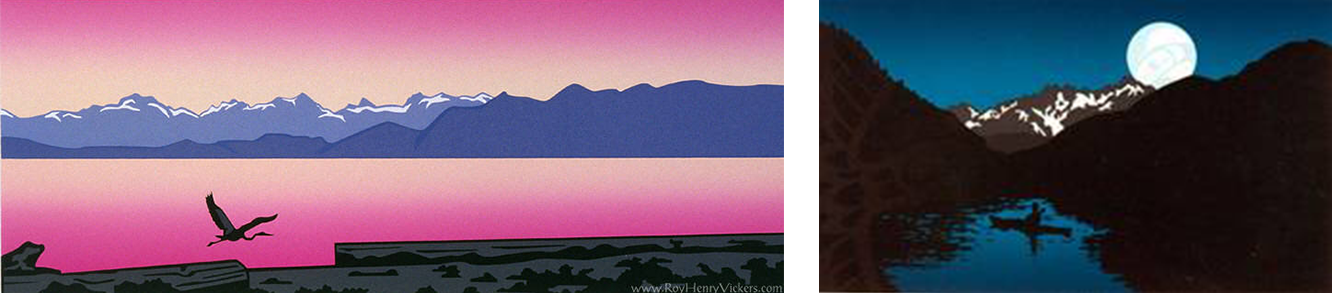
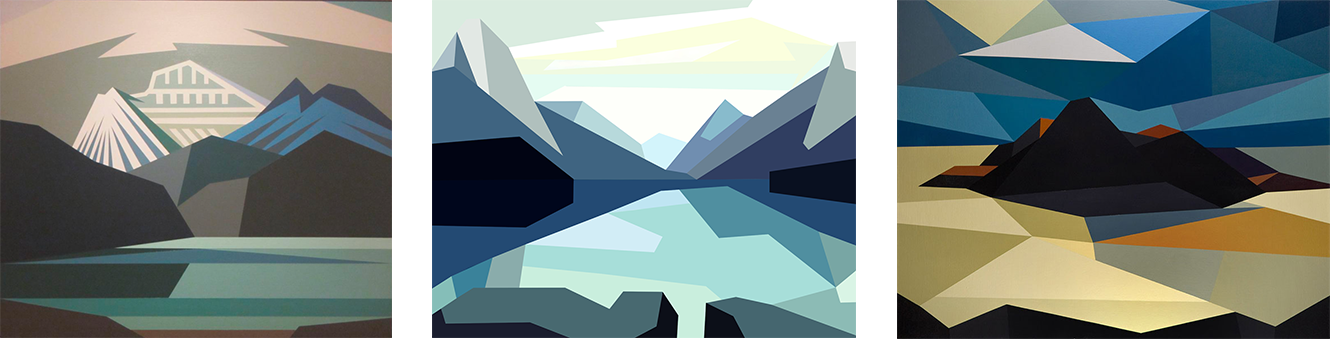
A collaboration with Ricardo Cabello of three.js. Inspired by the coastline of British Columbia and the work of Roy Henry Vickers. Created with Cinema 4D, three.js.
Basic workflow
The high-level process that brought Sechelt to life:
- Scene modeled in Cinema 4D.
- Scene optimized by combing geometries and eliminating unnecessary materials.
- Scene models exported from Cinema 4D to Collada
.DAE. - DAE file opened in three.js Editor.
- Scene setup, animation, interactivity, and sound created in three.js.
- VR support implemented with
VRControlsandVREffectthree.js extras.
Pre Production
Inspiration and art direction
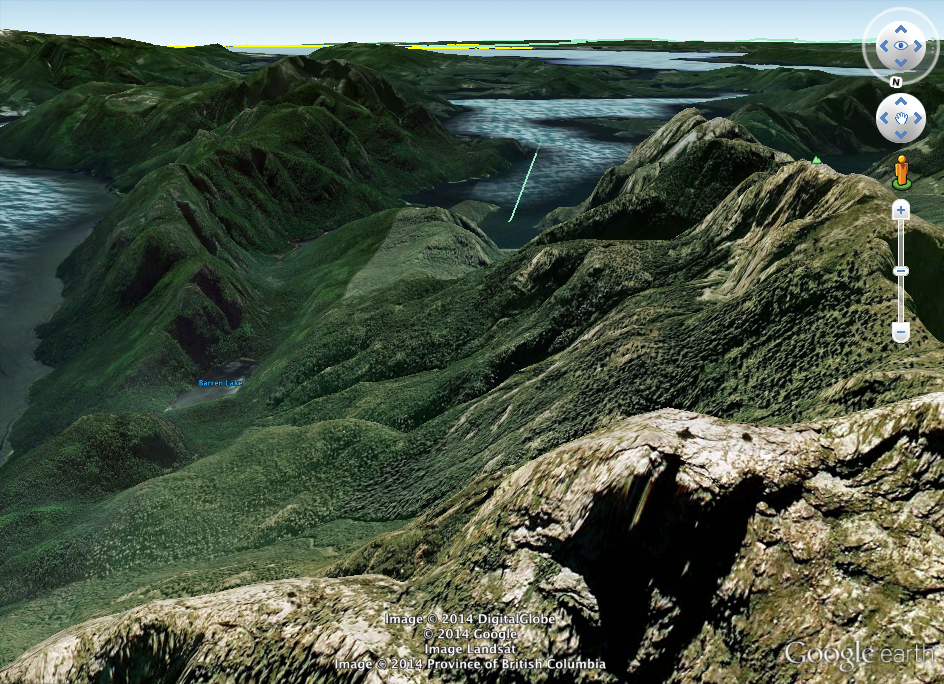
Google Earth:
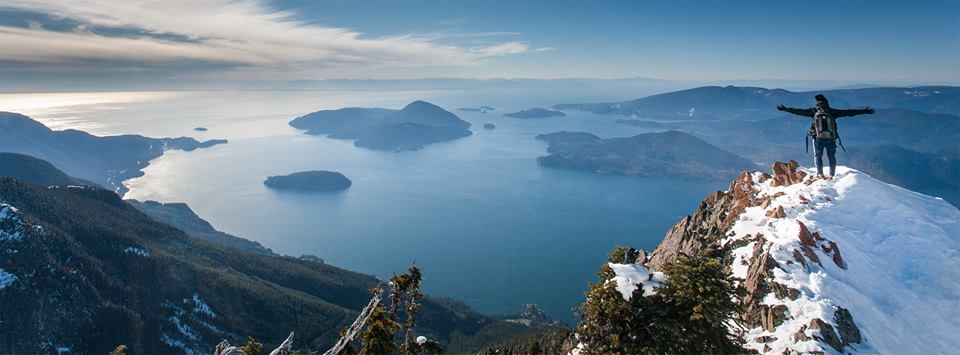
Scouting a location
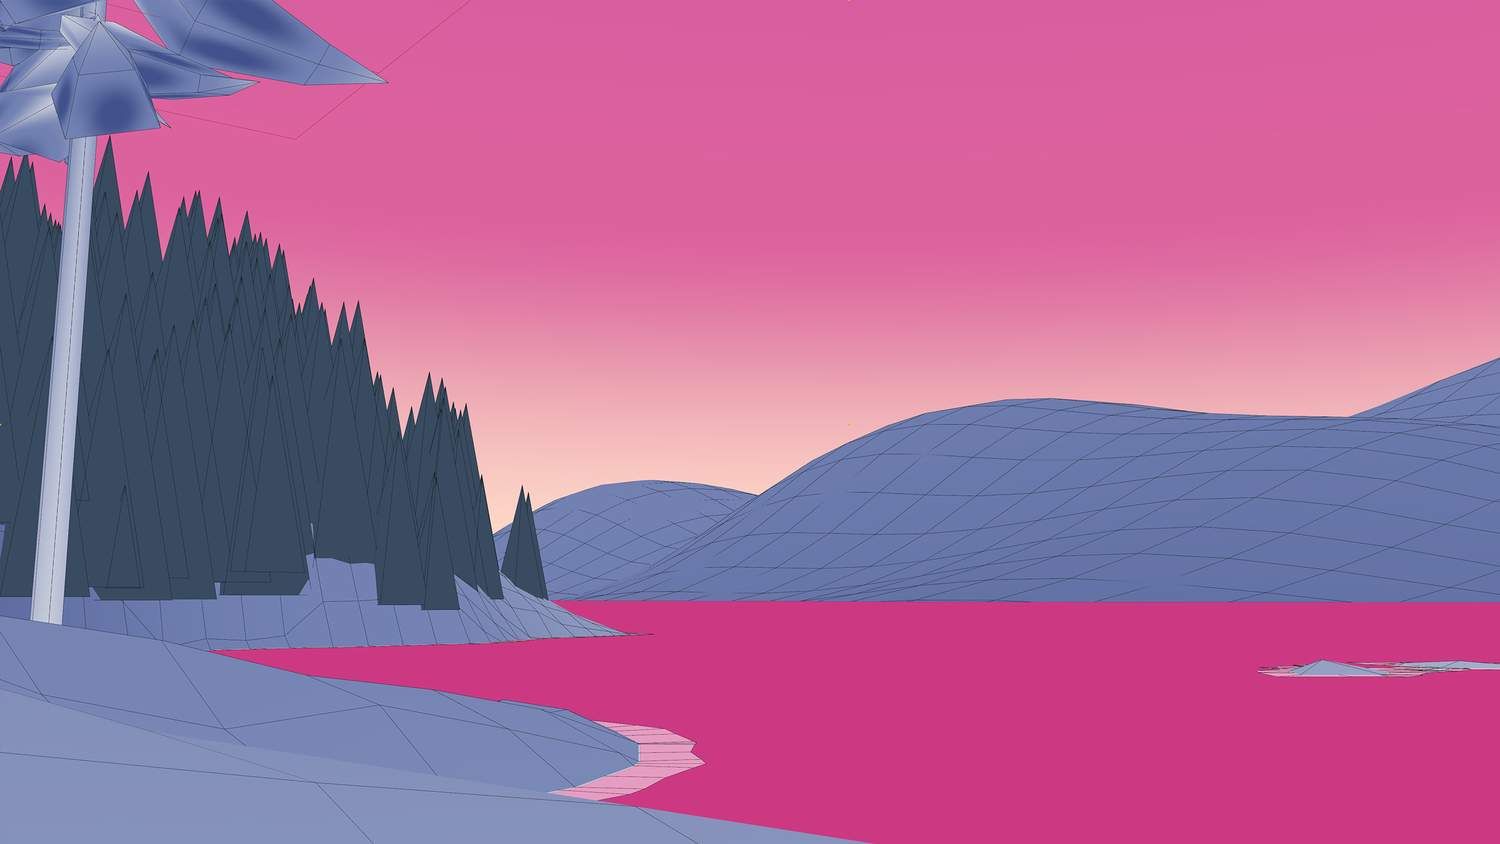
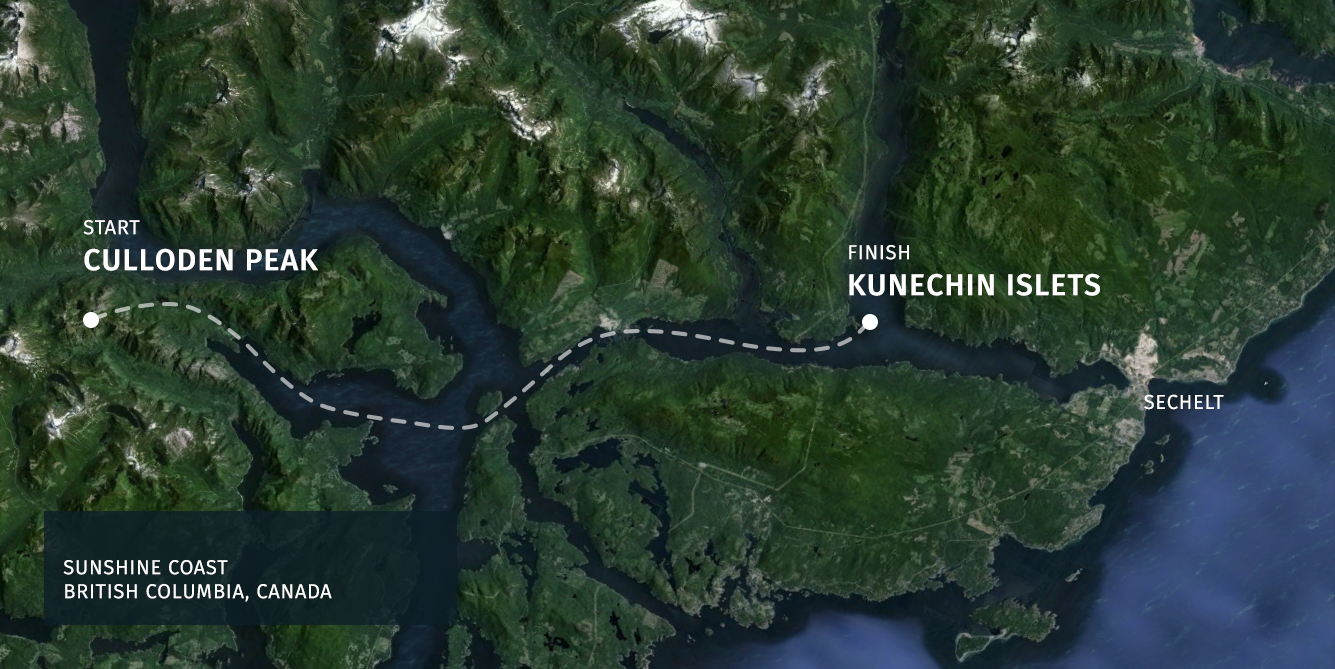
It was important to us to capture the reality of BC's coastal landscape, with its steep glacier-carved valleys and it's uncountable forested islands, stretching north from Vancouver to Alaska. To find a location, we used Google Earth to identify promising flight paths and vistas, eventually settling on a path stretching south from a mountain peak to the town of Sechelt.
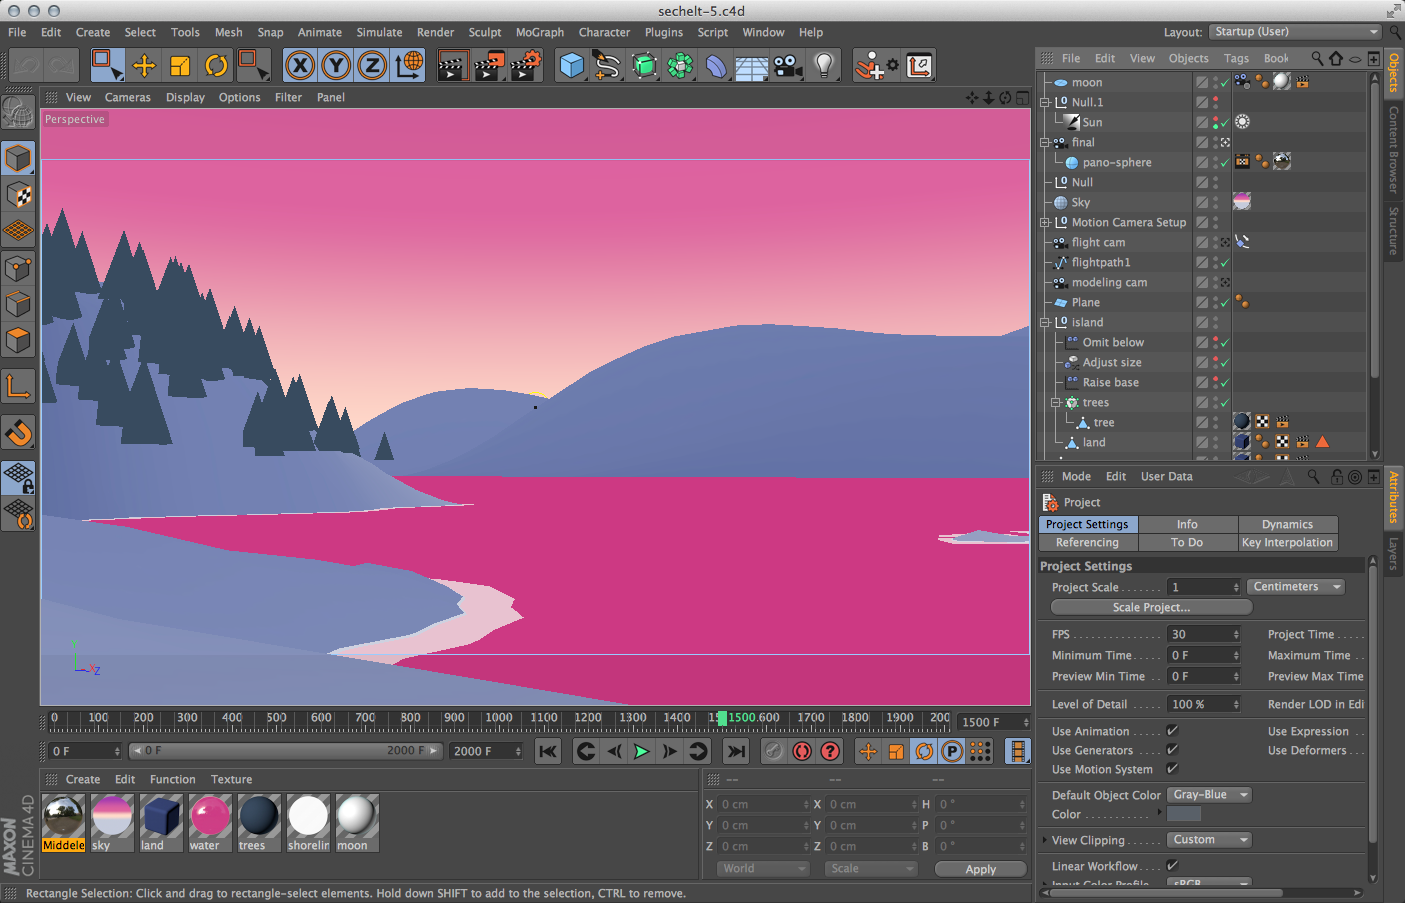
Cinema 4D
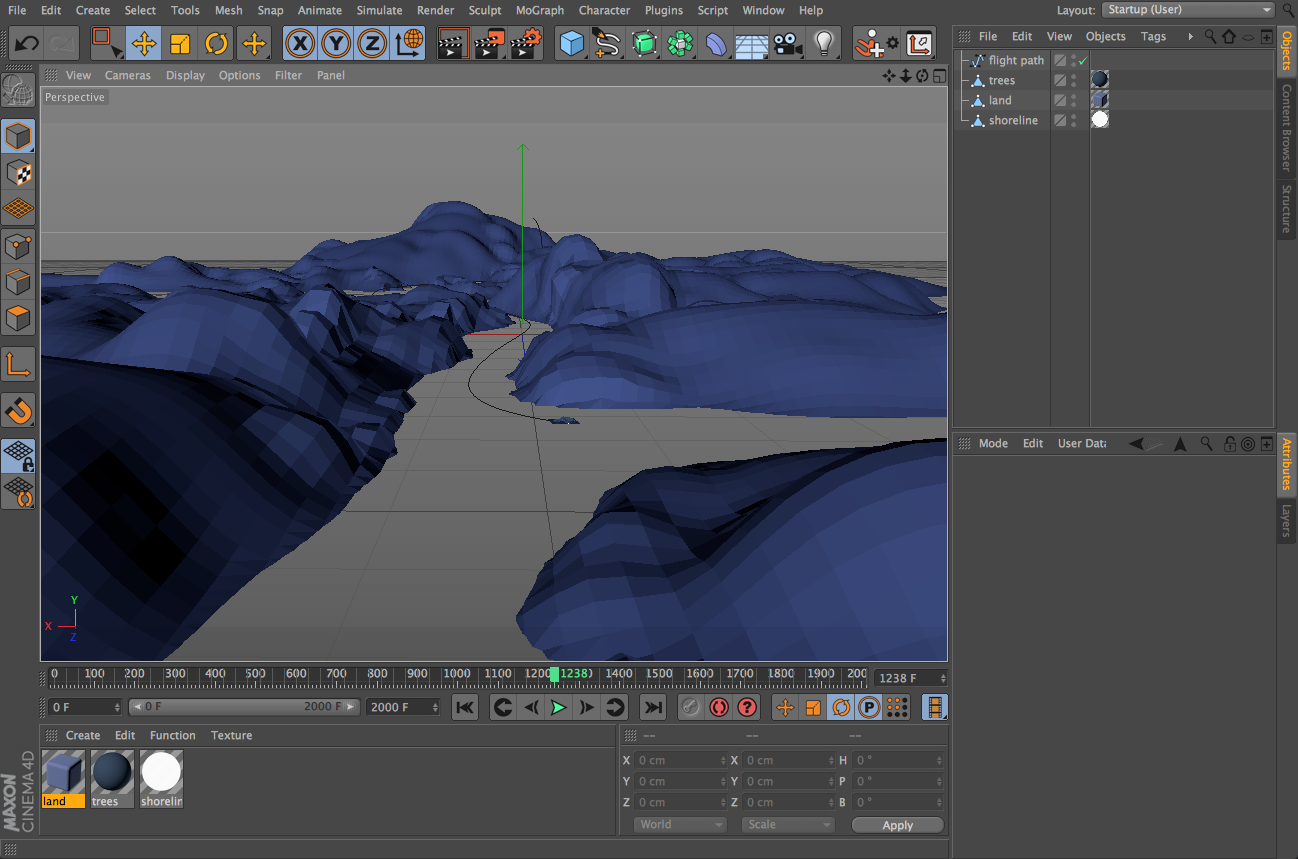
Modeling and lighting
This landscape was then modeled in Cinema 4D using the sculpt tool. Getting the lighting right was critical to achieving the desired look, and performance was a concern, so we opted to use a shader-based system. There are no lights in the scene. The landscape, water, trees etc are all colored with shaders. The fade of the landscape, from purple to light blue as it stretches into the distance, was achieved with a Gradient shader in the landscape material's Luminance channel. The shader is a set to 2000cm, and mapped to the position of the camera, making objects close to the camera dark, and objects further away progressively lighter.

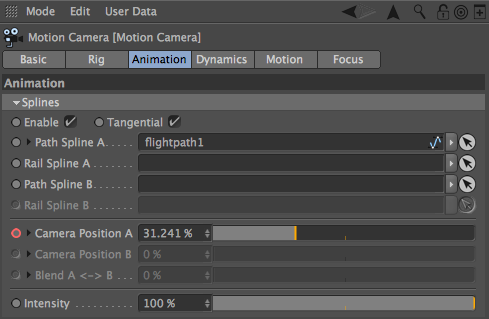
Camera animation
The camera animation was defined with Cinema 4D's Motion Camera tool. A spline was carefully modeled, sweeping through the scene. The Motion Camera's path was set to the spline, and the Camera Position then animated from 0 to 100%. At the end I wanted the camera to come to rest in a very precise position, which proved difficult to achieve by tweaking the spline points. So we instead created a second camera, framed it just right, then set the Motion Camera to switch between aligning itself to the spline, and aligning itself to this second camera, at the very end of the sequence. The final effect was seamless.
Exporting the Cinema 4D assets
To exporting the assets from Cinema 4D to three.js it was important to get several things right, or we found the results were unwieldy, mismatched, slow, etc. The steps we took were to:
1. Adjust the scale
The original scene was modeled to match the actual landscape, in meters. This made the units too massive to easily handle, however, so we scaled the scene down to centimeters before exporting.
2. Reduce the number of individual objects by merging
In Cinema 4D the trees were dozens of individual objects each with their own instance of the tree material. It is important to reduce the number of unique geometries and materials when working with three.js, however, for both performance and logistics reasons. So before we exported the scene, we deleted any unused objects and merged the trees into one single object with one material instance.
3. Clean up the geometry
If the camera was not going to see something, we deleted it. The meant carving out sections of the landscape, such as the backside of the mountains flanking the valleys.
three.js Implementation
Importing scene models
We recreated the Cinema 4D scene in three.js by importing the objects inside the .DAE file with the following:
var loader = new THREE.ObjectLoader();
loader.load( 'c4d-scene.json', function ( object ) {

  var landscape = object.getObjectByName( 'landscape' );

  var reflection = new THREE.Mesh( landscape.geometry, landscape.material.clone() );
  reflection.material.side = THREE.BackSide;
  reflection.position.y = 7.7;
  reflection.scale.y = -1;
  landscape.parent.add( reflection );

  scene.add( object );

} );
To create the effect of the landscape reflecting on the "water," Ricardo actually duplicated the landscape, inverted it on the Y-axis, and moved it down. This seems more convoluted than simply created a water surface with a reflection shader (as we did in the original Cinema 4D scene), but within WebGL this approach is faster and enables finer control over the look of the reflection by modifying the reflection object's materials and other scene objects.
Ambient sounds
As the user moves through the scene they hear waves, wildlife, and wind. These sounds are mapped to the environment itself, helping to create a sense of immersion within the 3D world. This effect was achieved by Ricardo, who created null objects in the 3D world, mapped sounds to them, and mapped the playback volume of the sounds to the distance of the user. Sound clips were sourced from Freesound.org.
var listener = new THREE.AudioListener();
camera.add( listener );

var sound = new THREE.Audio( listener );
sound.load( 'sounds/78389__inchadney__seagulls.ogg' );
sound.position.set( 475, 50, 850 );
sound.setLoop( true );
sound.setRefDistance( 100 );
scene.add( sound );
Camera system
We were inspired by the app Eden River to implement a control scheme that was completely hands free and intuitive. As users fly through the Sechelt scene, their position travels along the path that was defined in Cinema 4D. By tilting their head, however, they can "bank" the camera, like a plane, to steer left and right, deviating slightly in the direction they wish to go. This feels a bit like flying a plane. We love this control scheme because 1) it takes advantage of the head set's innate head tracking capabilities, 2) it is entirely optional, with new users able to enjoy their experience even if they never discover the head-tilt mechanic, 3) it does not require an external input device, and 4) it is so satisfying.
Ricardo implemented this control scheme in three.js by creating a dolly system that tracks both the user's headset data and the position of the camera on the pre-defined path, and then averages them.
if ( cameraPath !== undefined ) {

  var time = ( performance.now() / 40000 ) % 1;

  var pointA = cameraPath.getPointAt( time );
  var pointB = cameraPath.getPointAt( Math.min( time + 0.015, 1 ) );

  pointA.z = -pointA.z;
  pointB.z = -pointB.z;

  dolly.position.copy( pointA );
  dolly.lookAt( pointB );

  dolly.rotateY( Math.PI ); // look forward

}

controls.update();

sky.position.copy( dolly.position );

water.position.x = dolly.position.x;
water.position.z = dolly.position.z;

effect.render( scene, camera );
To bring camera data from Cinema 4D into three.js, we exported the individual points that define the camera path in C4D as ASCII text, and then imported them into three.js using an importer that Ricardo wrote:
var loader = new THREE.C4DLineLoader();
loader.load( 'flightpath-ascii.txt', function ( line ) {

  cameraPath = line;

} );
Testing & Optimization
Adding VR headset support
Support for VR headsets was implemented with two three.js components: VRControls and VREffect. These take the scene and enable VR headset support.
Testing
We tested the results with DK1 and DK2 headsets and random coworkers, trying to find people who were particularly sensitive to the nausea and disorientation that VR can produce if not properly calibrated.
Deployment
For the start of the development process we simple worked out of a Dropbox folder, with Ricardo saving this progress as he went. Our standard process is to use Git, NPM and Gulp track changes, manage dependencies and automate various development tasks, but early in the process we were more concerned with quick results, and with just Ricardo doing the code a simple setup was good enough. Before deploying, however, we organized the code and pushed to GitHub, hosting everything with GitHub Pages, using gulp-gh-pages to automate the process.