Building an In-Game Editor
 -
-
This is part 4 of my series on how I built Jingle Smash, a block smashing WebVR game
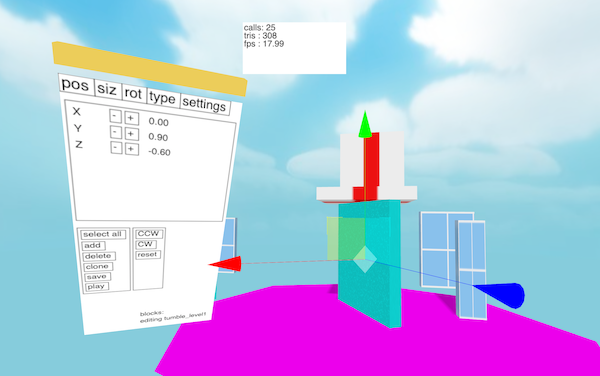
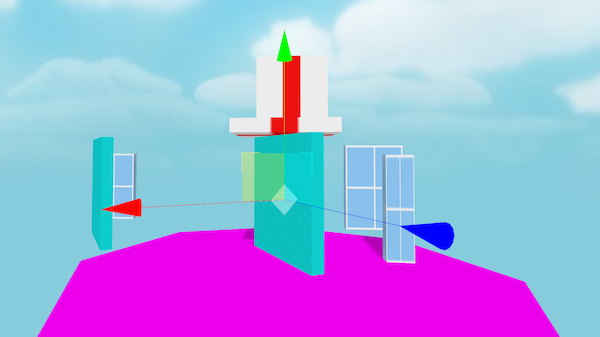
Jingle Smash is a WebVR game where you shoot ornaments at blocks to knock them over. It has multiple levels, each which is custom designed with blocks to form the puzzle. Since you play in a first person perspective 3D, the levels must carefully designed for this unique view point. To make the design proess easier I created a simple in-game 3D editor.
While Jingle Smash is similar in concept to Angry Birds there is a big difference. The player sees the level head on from a 3D perspective instead of a side view. This means the player can’t see the whole level at once, requiring completely custom designed levels. Rovio is facing this challenge as well with their upcoming VR version of Angry Birds. The difficult part of editing a 3D game on a desktop is that you don’t really experience the levels the same way they will actually be played.
At first I went back and forth from 2D view to my VR headset every time I made a change to a level, even just sliding a few blocks around. As you can imagine this grew very tedious. The ideal tool would let me move objects around in the same mode where I play with them. I needed an in-game editor. So that’s what I built, and I created a minimal UI toolkit in the process.
Basic editing
Levels are stored as JSON files, loaded and saved from a server I had already created for another purpose. For moving objects around I used the TransformControls example code from ThreeJS. Doing transform controls right is hard, so I didn’t want to reinvent that wheel.
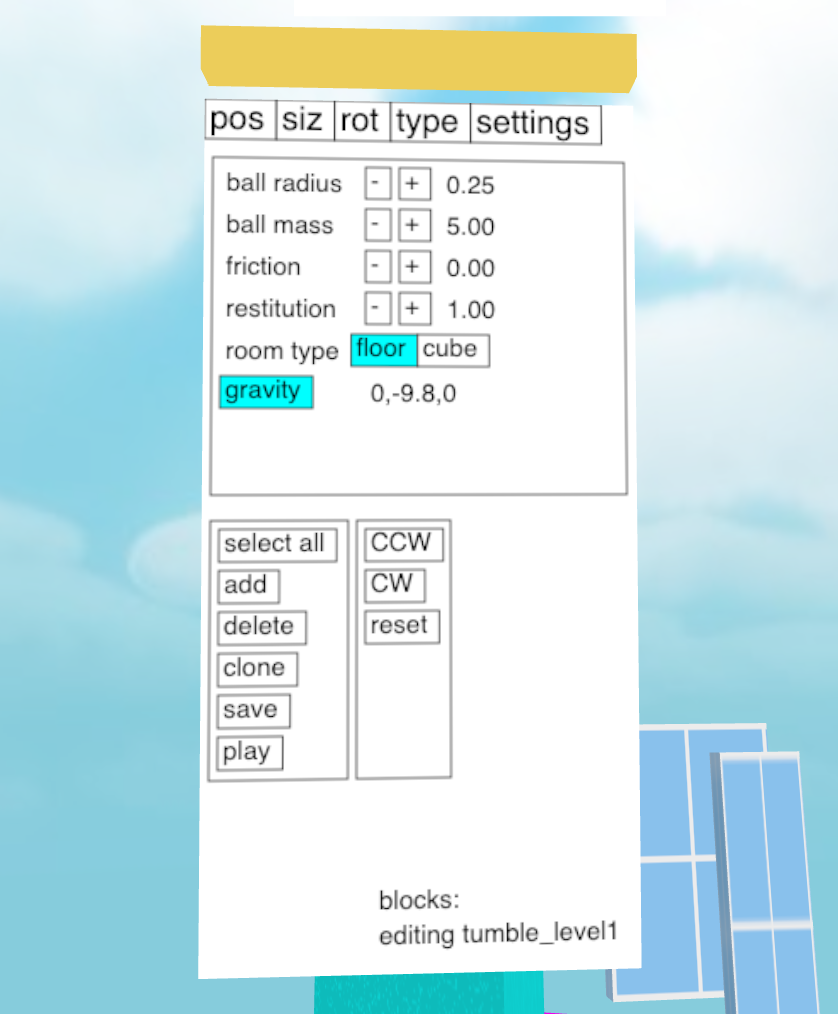
In addition to moving blocks around I needed a way to create and delete them and set their properties like size, type, and weight. This called for a property sheet. The problem is when we go into immersive mode we no longer have access to the DOM. We can’t just reuse HTML buttons and labels like we would in a 2D editor.
One solution would be Dom2Texture, an API for rendering a chunk of the DOM to a texture, which we could then map into 3D space. Unfortunately that is disabled until we can find a way to address the security issues (though there are ways to hack around it). However, we do have HTML Canvas, which lets us draw anything we want in 2D then copy that bitmap to a texture in 3D space.
To link the 2D Canvas and 3D ThreeJS APIs I created an adapter class called Panel2D. What you see below is an abbreviated copy of the class. For the full code you can read it on Github.
export default class Panel2D extends THREE.Object3D {
    this.canvas = document.createElement('canvas')
    this.canvas.width = 256
    this.canvas.height = 512
    this.canvasTexture = new THREE.CanvasTexture(this.canvas)
    this.mesh = new THREE.Mesh(
        new THREE.PlaneGeometry(1,2),
        new THREE.MeshBasicMaterial({color:'white',map:this.canvasTexture})
    )
    this.add(this.mesh)
    this.comps = []
The code above creates an HTML Canvas element, a ThreeJS CanvasTexture to turn the canvas into a texture, and then a PlaneGeometry mesh to draw the texture in 3D space. This class holds a reference to all components internally in the this.comps variable.
To draw the 2D components the code calls them recursively with a reference to the canvas drawing context, then updates the texture.
redraw() {
    const ctx = this.canvas.getContext('2d')

    // fill background width white
    ctx.fillStyle = 'white'
    ctx.fillRect(0,0,this.canvas.width,this.canvas.height)

    // draw each component
    this.comps.forEach(comp => comp.draw(ctx))

    // update the texture
    this.canvasTexture.needsUpdate = true
}
Handling Input
In 3D we have pointer events which are fired whenever the user’s pointer moves around in 3D space at different angles. 2D UI toolkits really expect something like a mouse event measured in pixels. To bridge this gap we must convert from 3d coordinates to 2d coordinates on the canvas.
//inside constructor
on(this.mesh,POINTER_CLICK,(e)=>{
    const uv = e.intersection.uv
    const fpt = new THREE.Vector2(uv.x*256, 512-uv.y*512)
    const comp = this.findAt(fpt)
    if(comp) comp.fire(POINTER_CLICK)
})

//method to recursively find components at mouse coords
findAt(pt) {
    for(let i=0; i<this.comps.length; i++) {
        const comp = this.comps[i]
        const res = comp.findAt({x:pt.x-comp.x,y:pt.y-comp.y})
        if(res) return res
    }
    return null
}
The pointer events using my abstraction provide a reference to the intersection, which includes the UV value. The UV is from 0 to 1 in the vertical and horizontal directions across the texture. The above code multiplies the UV by size of the canvas (256x512px) and flips the y axis to get 2D canvas coords, then recursively finds which component is under the cursor using the findAt method. Each comp class implements findAt to return if the component matches the mouse cursor.
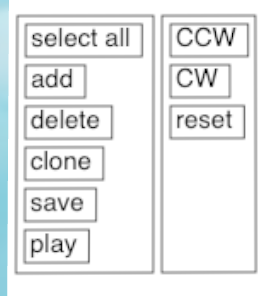
UI controls
With the infrastructure in place we can create some actual UI controls. This isn’t meant to be a full UI toolkit that can handle every possible use case. Instead I tried to build the simplest thing possible. A UI control is an object with get, set, draw, and findAt methods. That’s it. There’s no hierarchy or theming, though that could be added later in a fancier version. There is just enough in the base to make it work for a property sheet.
export default class Button2D {

constructor() {
    this.type = 'button'
    this.text = 'foo'
    this.x = 0
    this.y = 0
    this.fsize = 20
    this.w = this.text.length*this.fsize
    this.h = 20
}

draw(ctx) {
    ctx.font = `${this.fsize}px sans-serif`
    const metrics = ctx.measureText(this.text)
    this.w = 5 + metrics.width + 5
    this.h = 0 + this.fsize + 4
    ctx.fillStyle = this.bg
    ctx.fillRect(this.x,this.y,this.w,this.h)
    ctx.fillStyle = 'black'
    ctx.fillText(this.text,this.x+3,this.y+this.fsize-2)
    ctx.strokeStyle = 'black'
    ctx.strokeRect(this.x,this.y,this.w,this.h)
}

findAt(pt) {
    if(pt.x < 0) return null
    if(pt.x > 0 + this.w) return null
    if(pt.y < 0) return null
    if(pt.y > 0 + this.h) return null
    return this
}

set(key,value) {
    this[key] = value
    this.fire('changed',{type:'changed',target:this})
    return this
}
get(key) {
    return this[key]
}
The code above is for a simple button that draws itself and can respond to click events. Note that HTML Canvas doesn’t have a way to tell you the height of some text, only the width (actually it does, but support isn’t universal yet), so I used font sizes in pixels.
The set method fires a changed event. The root component listens for these to know when to redraw and update the texture to the 3D scene.
From this base I created additional classes for labels and groups. A label is like a button but without any input. It’s findAt method always returns false. A group is a control that calls this.layout() before drawing its children. By overriding layout we can implement rows, grids, or any other layout we want. The example below creates a panel with a row layout.
const rowLayout = (panel)=>{
    let x = 0
    panel.comps.forEach((c)=>{
        c.x=x
        c.y=0
        x += c.w+panel.padding
    })
}

const tabPanel = new Group2D()
    .set('x',0)
    .set('y',0)
    .set('w',250)
    .set('h',32)
    .set('layout',rowLayout)
    .set('padding',0)
    .set('border',0)
You’ll notice that I didn’t create any text input controls. That is because VR headsets generally don’t have physical keyboards attached, so I would have to implement a software keyboard from scratch. That is a lot of work and, honestly, point and click keyboards in VR are no fun.
Alternatively could temporarily jump out of immersive mode to do traditional text entry then jump back in. However this would be jarring, and would still require a software keyboard on standalone alone devices like the Oculus Go. Since I could get away without text input for this project I decided to skip it.
Next Steps
While it wasn’t pretty, the in-game editor got the job done and let me built levels far faster than I could have by editing JSON as text. I’m really happy with how it came out.
The code for the UI controls is in the webxr-experiments/physics git repo. If there is some interest I can clean up the code and move it into a standalone library that just requires ThreeJS.
Now that you've learned a bit about how I made Jingle Smash, you might want to watch my new Youtube Series on How to make VR with the Web.